


In an era where our lives are increasingly online, personal data has become a goldmine—not just for companies but for cybercriminals who trade it on the dark web. The dark web, a shadowy corner of the internet accessible only through tools like Tor, is where stolen email addresses, passwords, and other sensitive information are sold to the highest bidder. If your data ends up there, you could face identity theft, financial fraud, or unauthorized access to your accounts. Fortunately, you can take steps to check if your information has been compromised and secure it before damage is done. In this detailed guide, we’ll walk you through how to check if your email has been “pwned” (exposed in a data breach) using Have I Been Pwned, and provide step-by-step instructions to lock down your accounts—focusing on Gmail as an example—while safeguarding your digital life.
Step 1: Check If Your Email Has Been Pwned
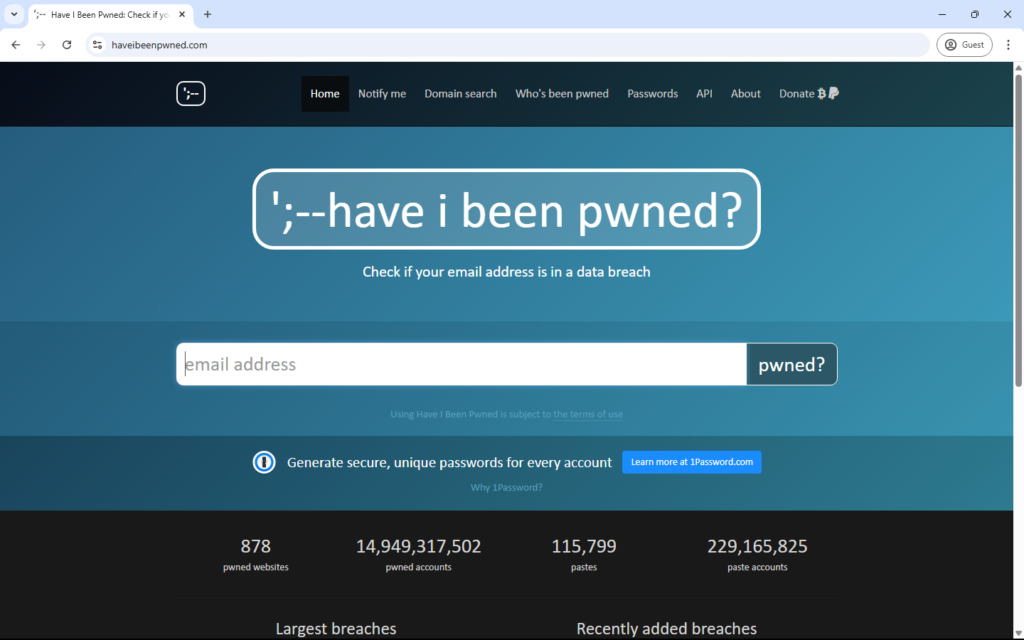
Before you can protect yourself, you need to know if your data is at risk. The simplest way is to use Have I Been Pwned (HIBP), a free tool created by security expert Troy Hunt that tracks data breaches.
Here’s how to do it:
- Go to the Website: Open your browser and navigate to haveibeenpwned.com.
- Enter Your Email: In the search bar at the top, type the email address you want to check (e.g., yourname@gmail.com) and click the “pwned?” button.
- Interpret the Results:
- Green Message: If you see “Good news — no pwnage found!”, congratulations! Your email hasn’t appeared in any known breaches tracked by HIBP.
- Red Message: If it says “Oh no — pwned!”, your email has been exposed. HIBP will list the breaches (e.g., “Adobe, 2013” or “LinkedIn, 2016”) and what data was compromised—like passwords, usernames, or even phone numbers.
If You’re Safe: That’s great news! But don’t rest on your laurels—cybersecurity is an ongoing process, and we’ll cover how to stay secure later.
If You’ve Been Pwned: Don’t worry—it’s not the end of the world. It just means your data is out there, possibly on the dark web, and you need to act fast to “unpwn” it. Let’s dive into the details.
Step 2: Take Action to “Unpwn” Your Data
Finding out your email has been compromised can feel overwhelming, but with a clear plan, you can regain control. Here’s how to secure your Gmail account (as an example) and extend these steps to other services.
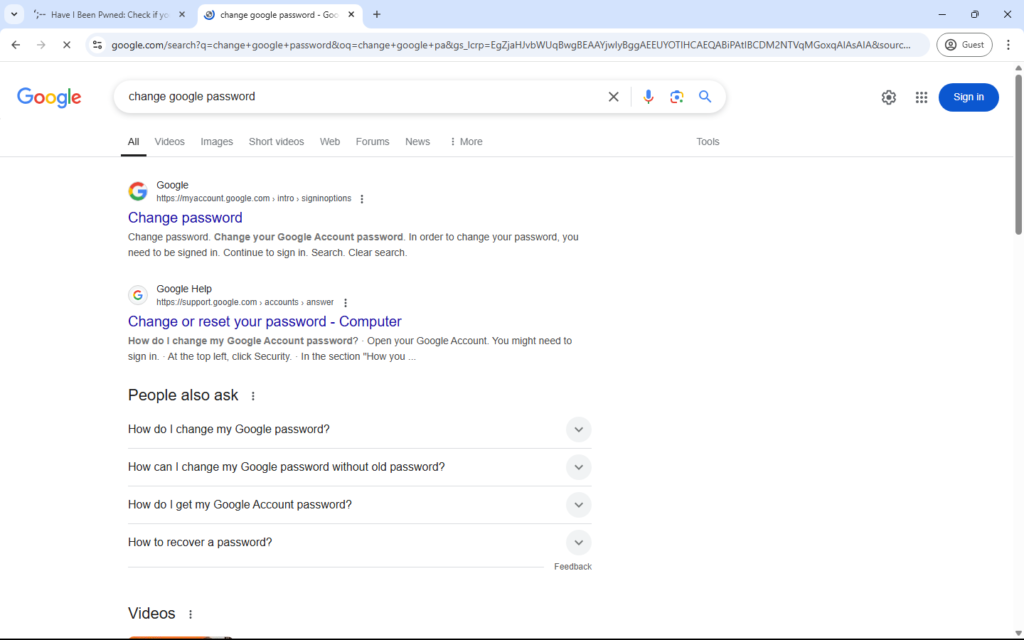
1. Change Your Gmail Password
If your email was part of a breach, your old password might be floating around, ready to be exploited. Changing it is your first line of defense.
How to Change Your Gmail Password:
- Log In: Open mail.google.com and sign into your Gmail account.
- Go to Settings: Click the gear icon in the top-right corner, then select “See all settings.”
- Access Google Account: Alternatively, click your profile picture (top-right), then “Manage your Google Account.”
- Navigate to Security: On the left sidebar, click “Security.”
- Find Password Settings: Scroll to the “Signing in to Google” section and click “Password.”
- Verify Identity: Enter your current password to confirm it’s you.
- Create a New Password:
- Enter a strong, unique password (e.g., Tr0ub4dor&2025!). Aim for at least 12 characters with a mix of uppercase, lowercase, numbers, and symbols.
- Don’t reuse passwords from other sites—this is critical!
- Tip: Use a password manager like LastPass, 1Password, or Bitwarden to generate and save it.
- Save Changes: Click “Change Password” to update it.
- Log Out Everywhere: In the “Security” tab, scroll to “Your devices,” click “Manage all devices,” and select “Sign out” on any unfamiliar or old devices.
Why It Matters: A fresh, strong password ensures that even if your old one was leaked, it’s useless to hackers.
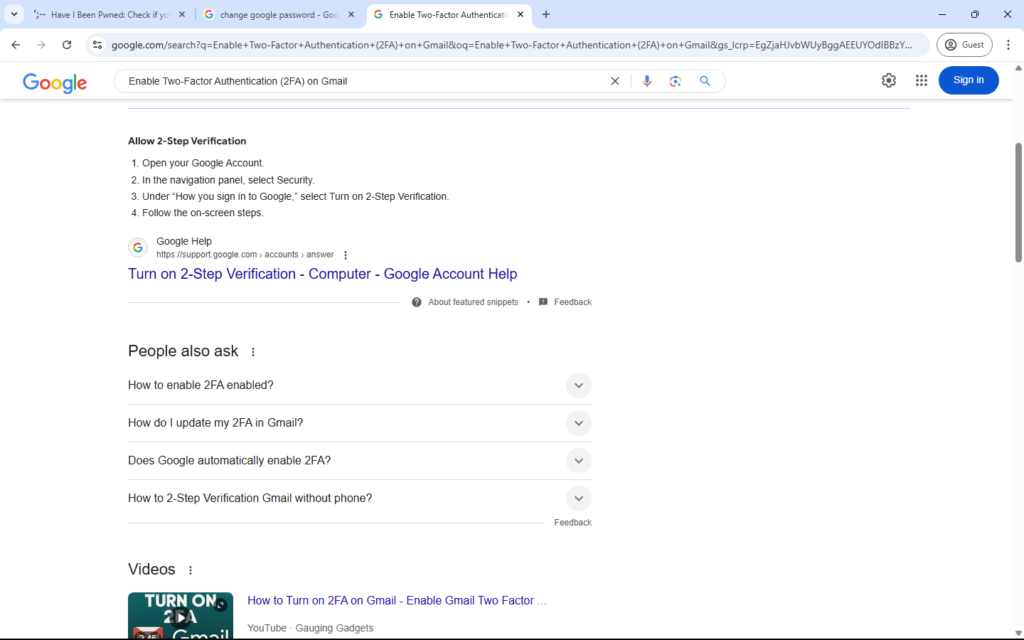
2. Enable Two-Factor Authentication (2FA) on Gmail
Changing your password is a start, but 2FA adds a second lock on your account, making it much harder for attackers to break in.
How to Enable 2FA on Gmail:
- Go to Google Account: From Gmail, click your profile picture, then “Manage your Google Account.”
- Security Tab: Click “Security” on the left.
- Find 2-Step Verification: Under “Signing in to Google,” click “2-Step Verification,” then “Get Started.”
- Sign In Again: Enter your password to verify your identity.
- Choose a Method:
- Google Authenticator (Recommended): Download the Google Authenticator app on your phone, scan the QR code on-screen, and enter the 6-digit code it generates.
- Text Message/Phone Call: Add your phone number and receive a code via SMS or voice call.
- Backup Codes: Generate a set of 10 one-time-use codes to print or save securely (e.g., in a password manager).
- Confirm and Turn On: Follow the prompts to finish setup and enable 2FA.
- Test It: Log out, log back in, and ensure the second step (e.g., entering a code) works.
Why It Matters: Even if someone gets your password, they can’t log in without that second factor—like the code from your phone.
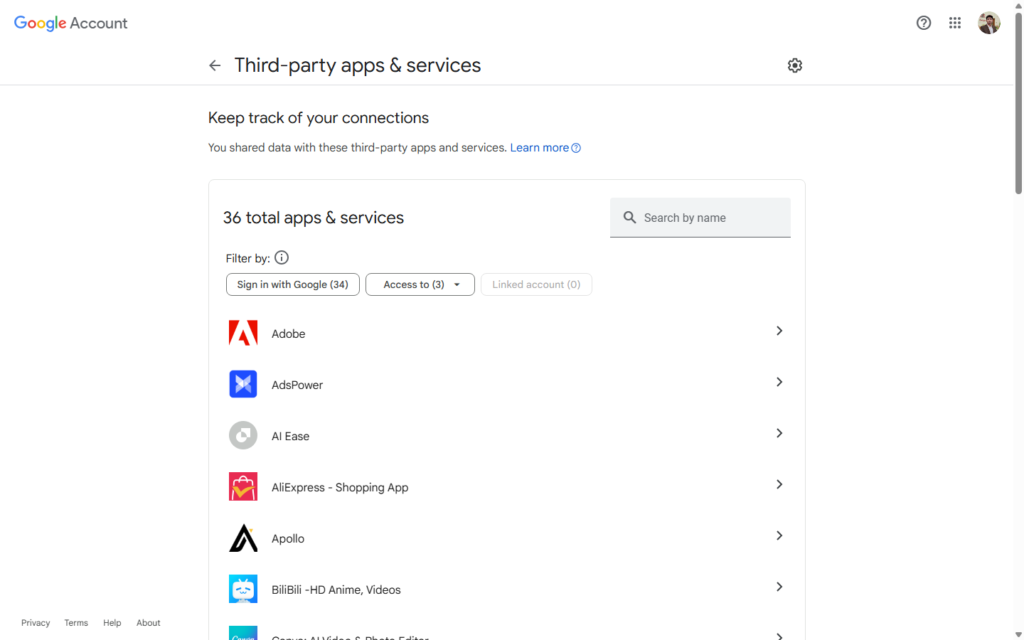
3. Check Apps and Websites Linked to Your Email
Your email is often the key to many accounts. If it’s compromised, every app or site where it’s used could be at risk.
How to Check Apps Linked to Your Gmail:
- Go to Security Settings: In “Manage your Google Account,” click “Security.”
- Third-Party Access: Scroll to “Third-party apps with account access” and click “Manage third-party access.”
- Review the List: You’ll see apps or services (e.g., a fitness tracker or old game) that have permission to use your Google account.
- Remove Unnecessary Apps:
- Click on any app you don’t recognize or no longer use.
- Select “Remove Access” and confirm.
- Check Sign-In Activity: In the “Security” tab, under “Your devices” or “Recent security events,” look for unfamiliar logins. If you spot any, click “Secure your account” and follow the prompts.
How to Find Other Accounts:
- Search Your Inbox: Open Gmail and search for terms like “welcome,” “verify your email,” “account created,” or “subscription” to find old sign-ups.
- Browser Passwords: In Chrome, go to “Settings” > “Passwords” to see saved logins tied to your email.
- Update Them: For each account:
- Log in with your current credentials.
- Change the password to a new, unique one.
- Enable 2FA if available (check the account’s security settings).
Why It Matters: Old or unused accounts are vulnerabilities waiting to be exploited. Removing them or securing them reduces your risk.
4. Delete Unused Accounts (Continued)
Forgotten accounts tied to your email are like ticking time bombs—quietly waiting to be exploited in a data breach. Deleting them reduces your digital footprint and keeps your data off the dark web.
How to Delete Accounts (Continued):
- Identify Them: From your inbox search, note services you no longer need. Look for emails with phrases like “Welcome to [Service],” “Your account is ready,” or “Subscription confirmed” to jog your memory.
- Log In: Visit the website or app, sign in with your email and current password (you may need to reset it if you’ve forgotten it—use the “Forgot Password” link).
- Find the Deletion Option: Look for an account deletion feature, typically buried in:
- Settings > Account > Delete Account or Close Account.
- Privacy > Manage Your Data > Delete Your Account.
- If you can’t find it, search online for “[Service Name] delete account” (e.g., “Twitter delete account”) for specific instructions.
- Examples:
- Twitter (X): Log in, go to “Settings and Privacy” > “Your Account” > “Deactivate Your Account.” Confirm with your password and deactivate (it deletes after 30 days if you don’t log back in).
- Facebook: Go to “Settings” > “Your Facebook Information” > “Deactivation and Deletion,” select “Delete Account,” and follow the prompts.
- Old Forums or Apps: Some may not have a delete option—email their support team (e.g., support@[servicename].com) requesting account removal.
- Secure Before Deleting: If the account still matters slightly, change its password and enable 2FA first, then delete it.
- Confirm Deletion: Check your inbox for a confirmation email to ensure it’s gone.
Why It Matters: Every unused account is a potential entry point for hackers. Deleting them shrinks your attack surface and keeps your email less tied to vulnerable services.
5. Monitor for Suspicious Activity
Even after securing your accounts, someone might already have your leaked data. Staying vigilant helps you catch misuse early.
How to Monitor:
- Gmail Activity: In Gmail, scroll to the bottom-right and click “Details” (under “Last account activity”) to see recent logins, including locations and devices. If something looks off (e.g., a login from another country), click “Sign out all other sessions” and update your password immediately.
- Bank Accounts: Log into your bank or credit card accounts and review transactions. Set up alerts for logins or purchases via their app or website.
- HIBP Notifications: On haveibeenpwned.com, click “Notify me” and subscribe to get alerts if your email appears in future breaches.
- Credit Reports: In the U.S., visit annualcreditreport.com to check your credit for free weekly. Look for unfamiliar accounts or inquiries.
Why It Matters: Early detection lets you respond before significant damage—like drained bank accounts or fraudulent loans—occurs.
Step 3: Stay Proactive to Keep Your Data Off the Dark Web
Securing a pwned email is a huge win, but staying safe long-term requires building habits to prevent future leaks:
- Use Unique Passwords Everywhere: Never reuse passwords across sites. A breach on a small forum shouldn’t unlock your email or bank account. Password managers make this effortless—try LastPass, 1Password, or Bitwarden to generate and store passwords like K9$m!cR@ft2025.
- Check HIBP Regularly: Revisit Have I Been Pwned every 3-6 months (or after major breach news) to stay ahead of new exposures.
- Avoid Phishing Traps: Don’t click links or download attachments from unsolicited emails—they might be phishing attempts to steal more data. Hover over links (don’t click!) to see the real URL first.
- Use a VPN: A Virtual Private Network (e.g., NordVPN, ExpressVPN) encrypts your internet connection, especially on public Wi-Fi, making it harder for hackers to intercept your data.
- Freeze Your Credit: If a breach exposed sensitive info like your Social Security number, contact Equifax, Experian, and TransUnion to freeze your credit. This blocks criminals from opening accounts in your name. It’s free and can be lifted when you need to apply for credit.
- Update Software: Keep your phone, apps, and computer updated—patches fix vulnerabilities that hackers exploit to steal data.
Why This Matters
The dark web isn’t just a tech buzzword—it’s a thriving black market where your email and password can fetch a price. A single leaked credential might seem minor, but cybercriminals can use it to domino into your entire digital life: resetting banking passwords, locking you out of social media, or even impersonating you. For example, a breached email-password pair from a forgotten site could let someone access your Gmail, then use “Forgot Password” links to infiltrate your PayPal or Amazon accounts.
By checking Have I Been Pwned, you’re taking the first step to see if you’re already a target. If you’re not pwned, congratulations—keep up the good habits! If you are, following these steps—changing your Gmail password, enabling 2FA, auditing linked apps, and deleting old accounts—can “unpwn” your data and slam the door shut on dark web threats.
Final Thoughts
Your data’s presence on the dark web isn’t a death sentence—it’s a wake-up call. With tools like Have I Been Pwned and a few hours of effort, you can reclaim control. Start today: check your email, secure your Gmail, and prune your digital life. The peace of mind is worth it—and it’s far cheaper than recovering from identity theft. Stay safe out there!

